Hey there Ladies! It’s time to pull out your sewing machines again! You are about to get the perfect excuse to buy that darling fabric you’ve been dreaming about! Maybe no one else does that.. but I have a mental filing cabinet full of fabric I want to buy and use! Ok, maybe I’m just a little crazy.
We all know how much fun ironing is right?  Ok.. not right. I hate ironing. ESPECIALLY when I have to pull out my ugly, brown stained, worn out ironing board. Yuck, it makes the job so unpleasant. I finally had enough and decided I needed to find a way to iron in style. Sounds like fun? Ok, Lets get started!
Supplies:
About 2 yards of fabric – measure the length of your ironing board and add 9 inches
2 yards of 3/8″ elastic
Thread
Sewing Supplies
2 yards of 3/8″ elastic
Thread
Sewing Supplies
First things first! If you want to be able to wash your cover in the future, you need to pre-shrink your fabric! Throw it in the wash and dry it according to the instructions on the bolt at the fabric store. Usually you wash cold and dry at med heat. After it’s dry iron out all the wrinkles. Then you’re ready to start!
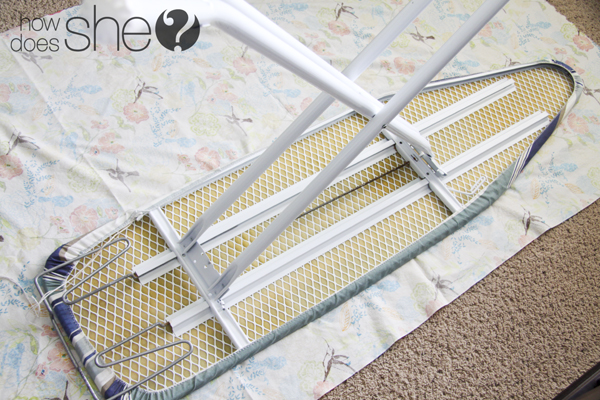
Turn your not so gorgeous ironing board upside down on top of your fabric. Line one edge about 3 1/2 inches away from the edge of the fabric, this way you have a good size piece of scrap fabric left on the other side!
Using a ruler or measuring tape cut the fabric 3 1/8″ away from the board edge. It doesn’t have to be perfect.
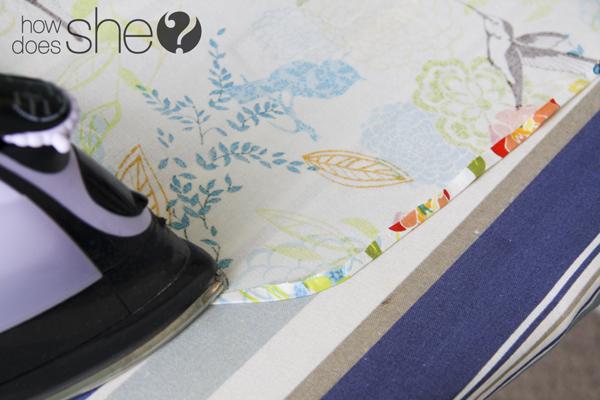
Flip your ironing board back on it’s legs. Now you’re going to press under 1/8″ along the edges of the piece you just cut. You will sew this under for a nice clean finish.
Stitch right on top of the newly pressed seam, it really doesn’t have to be perfect, just make sure the stitching goes through both layers.


0 comments:
Post a Comment